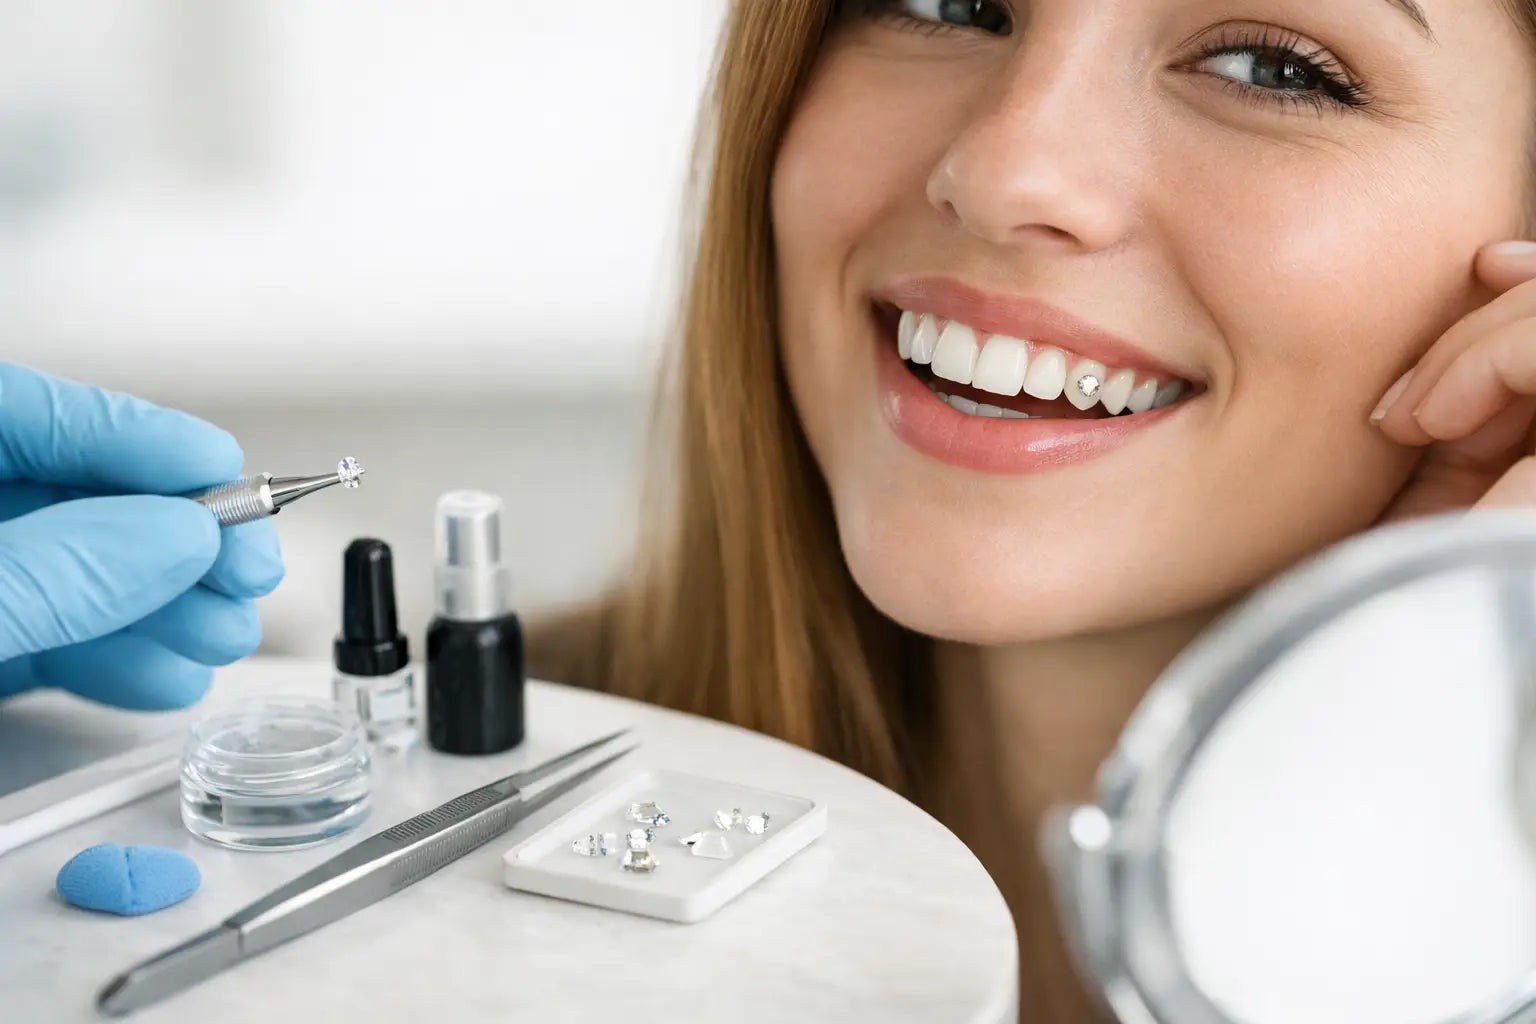
That first mirror check after placing a Tooth Gem is the whole point - clean sparkle, a little extra attitude, and a smile that looks instantly more styled. If you've been searching for DIY Tooth Gem Kit instructions, you probably want two things at once: a gem that looks amazing and a process that feels easy enough to do at home without guessing.
The good news is that applying a Tooth Gem is usually much more approachable than people expect. The catch is that results depend on prep, patience, and using each tool in the right order. A rushed application can mean weak hold, crooked placement, or a gem that falls off way too soon. A careful one gives you that polished, luxury look with much better staying power.
Before you start your DIY Tooth Gem Kit instructions
Prepare yourself like you're about to do any detail-focused beauty step. Good lighting matters. A clean mirror matters. Having every tool within reach matters even more, because once your tooth is prepped, you do not want to stop and dig around for a cotton roll or gem picker.
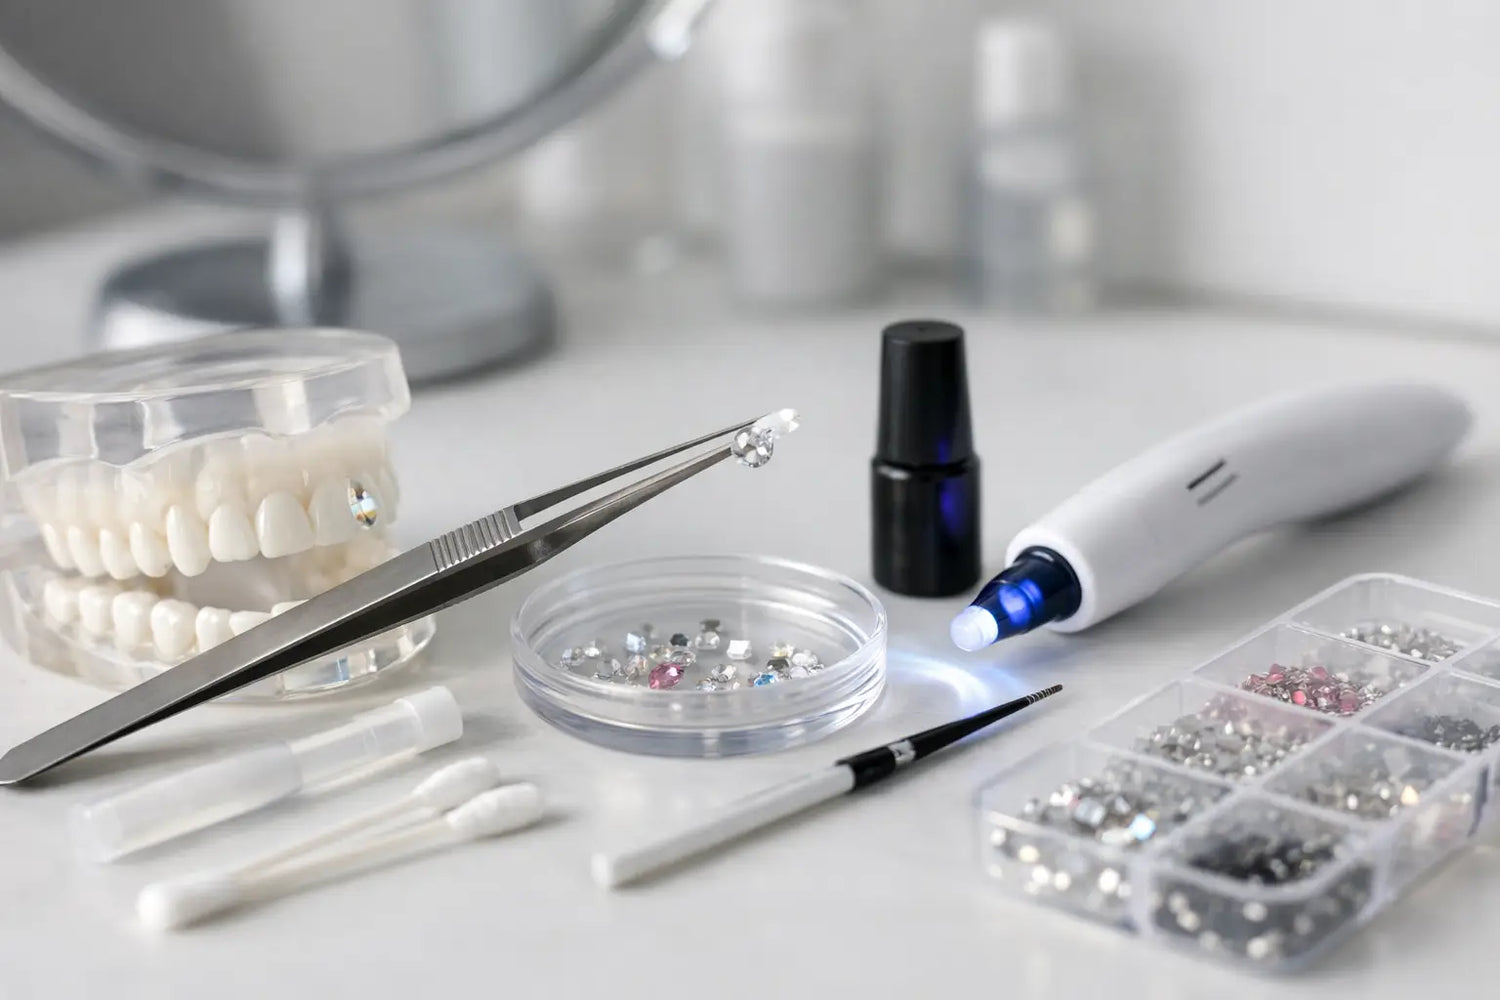
Most beginner kits include the basics: your gem, etch, bond or adhesive, a curing light, and small accessories that help keep the area dry. Some also include cheek retractors, cotton rolls, applicators, and placement tools. If your kit is customizable, double-check that you've chosen a gem size and shape that feels realistic for your first try. A tiny crystal is often easier to place than a more detailed shape. Browse the full range of tooth gems to find a size and style that suits your first application.
This is also the moment to check your tooth itself. Tooth Gems should only go on a healthy, natural tooth surface. If you have active decay, chipped enamel, sensitivity you haven't figured out, braces in the target area, or dental work where you want to place the gem, it's better to pause. DIY beauty should still respect basic oral care.
How to apply a tooth gem step by step
The exact DIY Tooth Gem Kit instructions can vary a little by formula, but the sequence is usually the same: clean, isolate, etch, dry, bond, place, cure, then leave it alone long enough to set properly.
Start with a fully clean tooth
Brush your teeth first and make sure there's no leftover toothpaste film, food debris, or lip product around the area. Some people like to rinse and then wait a few minutes so the tooth surface is clean but not actively wet. The goal is a fresh surface that gives the adhesive the best chance to grip.
Pick the tooth before you begin any product. Front teeth are the classic choice, usually slightly off-center for a subtle but still noticeable sparkle. Hold the gem up in the mirror first so you can see the look before committing. It sounds simple, but this step prevents a lot of repositioning later.
Keep the area dry
Moisture is one of the biggest reasons DIY tooth gem applications fail. Saliva can interfere with the bond, so use cotton rolls, a cheek retractor, or whatever dry-field tools your kit includes. If your mouth waters a lot when you're concentrating, take a breath and reset before moving on.
Drying the tooth well is not the glamorous part, but it's the part that helps the glamorous part last. If the tooth gets wet after you prep it, you may need to dry it again before continuing.
Apply the etch carefully
Etch is used to prep the enamel surface so the bond can hold more securely. You only want it on the small area where the gem will sit. Follow your kit timing exactly here. Leaving etch on too long or using more than needed does not improve results.
Once the etch step is complete, remove it exactly as directed by your kit instructions. Then dry the tooth thoroughly again. At this stage, the surface is prepped, and keeping it dry becomes even more important.
Add bond or adhesive
Next comes the bonding layer. Apply a very small amount to the prepared spot. Too little may not hold well, but too much can create a messy edge around the gem. This is one of those beauty steps where precision beats excess every time.
Some kits require curing the bond briefly before placing the gem, while others are designed for gem placement first and final curing after. Always follow the formula you have in front of you. Beauty DIY is not one-size-fits-all when chemistry is involved.
Place the gem with intention
Use your jewel picker or placement tool to pick up the gem and lower it onto the bonded area. Try to place it correctly the first time. You can make small adjustments, but too much sliding around can affect how neatly it sits.
Press gently, not hard. You want the gem seated in the adhesive, not pushed so aggressively that product spreads beyond the edges. If you're using a shape like a heart or butterfly, take an extra second to make sure the orientation is right before curing.
Cure the gem
Once the gem is in place, use the UV light according to your kit's timing instructions. Keep the light steady and close enough to cure properly without shifting your placement. If your kit recommends curing from more than one angle, do that. Even curing helps with hold.
After curing, inspect the gem in the mirror. It should feel secure and sit flat without obvious adhesive pooling around it. If something looks off, avoid picking at it with your fingers. A gem that has already started setting should not be disturbed casually.
What makes a tooth gem last longer
Application is only half the story. If you want your sparkling smile to keep its fresh, radiant look, the first day matters a lot.
Try not to eat immediately after application unless your kit says otherwise. Hard, sticky, or very crunchy foods can be rough on a new gem. The same goes for constantly touching it with your tongue, which almost everyone does at first. It's tempting, but repeated pressure can weaken a fresh bond.
Oral hygiene still matters, maybe more than ever. Brush gently around the gem and keep your teeth clean so the whole look stays bright. A gem looks best on a clean smile. If you let buildup collect around it, the effect goes from luxe to neglected pretty fast.
Common mistakes with DIY Tooth Gem Kit instructions
Most at-home issues come back to a few simple things. The tooth was not dry enough. The wrong amount of product was used. The gem was placed too slowly after prep. Or the aftercare was too casual.
Another common mistake is choosing a tricky design for your first application. Larger or more detailed gems can look incredible, but they also leave less room for error. If you're brand new, starting with a smaller crystal can help you get the technique down before moving on to bolder styles. Check the pre-packaged DIY Tooth Gem Kits for beginner-friendly options that include everything you need in one set.
There's also the question of expectations. A DIY kit can give beautiful results, but the wear time can vary based on your enamel, your habits, the products used, and how carefully you followed directions. If one person gets longer wear than another, that does not always mean someone did something wrong. Sometimes it really does depend.
When to remove it or get help
A tooth gem should never cause pain. If you feel sharpness, irritation that doesn't settle, or sensitivity that seems unusual, it's smart to stop treating it like a normal beauty hiccup. Your teeth are not the place to push through discomfort for the look.
If the gem loosens, resist the urge to glue it back on with random household or beauty adhesives. That shortcut is not worth it. Use products made for tooth gem application only, and if you're unsure what happened, get guidance before trying again. You'll find answers to the most common questions on our FAQ page.
Removal also deserves care. Don't pry a gem off with tools at home. If it needs to come off and you're not using a removal method recommended with your system, professional help is the safer move. Protecting your enamel always comes first.
Choosing a beginner-friendly kit
If you're still deciding what kind of kit to use, look for one that keeps the process clear rather than making it sound overly technical. A good beginner setup includes not just the gem and adhesive steps, but the tools that make application easier, like cotton rolls, placement tools, and a curing light that fits the process.
Customization is fun, but ease matters too. If you're between a dramatic gem design and a simple crystal for your first try, start simple and build from there. Confidence grows fast once you've done one clean application yourself. That's part of what makes at-home tooth gem styling so appealing - you get the beauty moment and the satisfaction of creating it. If you want to explore your options first, the build your own kit collection lets you compare styles and choose what fits you best.
At SelfGem, we believe the process should feel just as good as the result. That's why we pair trend-forward gem options with straightforward guidance and a simple tooth gem selector, so curiosity turns into an actual wearable look without the guesswork.
A tooth gem is a tiny detail, but it changes the whole energy of your smile when it's placed well. Take your time, follow the steps closely, and treat the prep like part of the glam. The sparkle hits better when the application feels just as polished as the final look.