A tooth gem that falls off in a day usually is not about the gem at all. It is almost always about prep. If you are trying to understand tooth gem bond and etch, this is the part of the process that makes the difference between a cute photo-op and a gem that actually stays put.
The good news is that bond and etch are not mysterious once you know what each one does. They are simply two different steps with two different jobs. One preps the tooth surface so adhesive can grip better, and the other helps create the hold that keeps your gem in place. If you are doing your own application at home, getting this part right is what gives your sparkling smile the best shot at looking polished and lasting longer.
What tooth gem bond and etch actually do
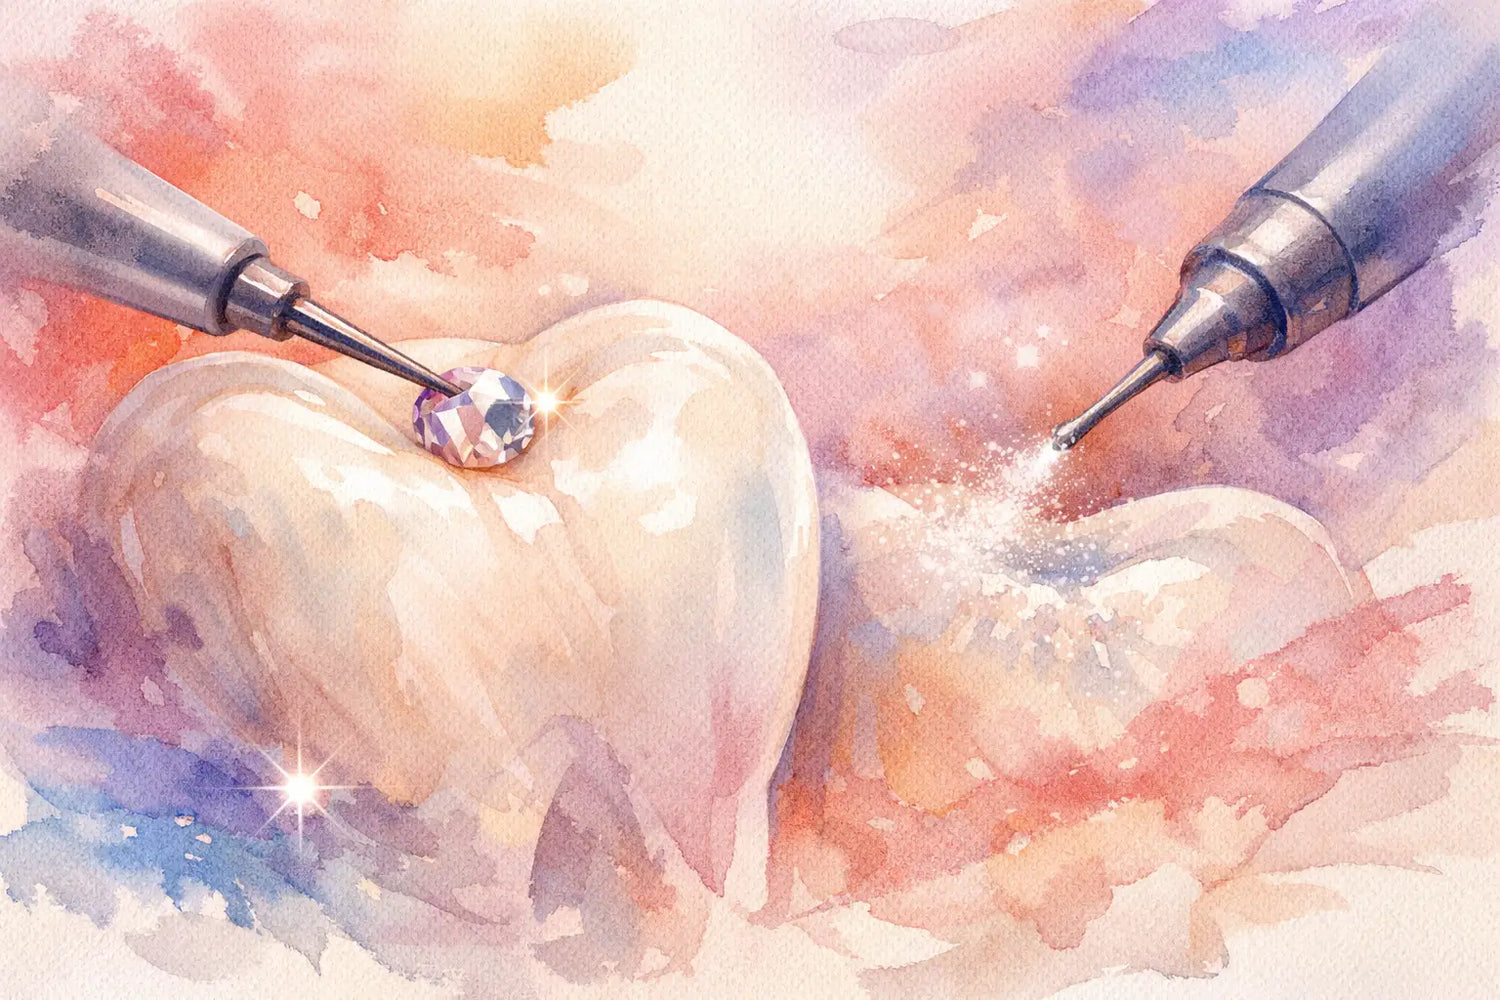
Etch goes first. Its job is to prepare the enamel surface by creating a slightly textured area that helps the next layer attach more effectively. Natural enamel is smooth, which is great for your teeth, but not ideal when you want a tiny decorative gem to stay in one exact spot.
Bond comes after the etch. Think of it as the connecting layer between the prepared tooth surface and the material that secures the gem. It helps the adhesive system attach more reliably, which matters a lot when the gem is small, visible, and constantly exposed to saliva, talking, eating, and brushing.
People sometimes treat these two steps like extras. They are not. If you skip etching or bonding, you are usually making the application less stable from the start. That does not mean every gem applied without them will fail instantly, but it does mean you are working against the result you want.
Why tooth gem bond and etch matter for DIY results
The appeal of DIY tooth gems is obvious. You get the trend, the customization, and the luxury look without booking a salon visit. But the part that separates beginner-friendly from beginner-frustrating is knowing that application is a process, not just a placement.
Bond and etch matter because teeth are not like nails or skin. You cannot just stick decoration onto enamel and expect a lasting hold. Teeth deal with moisture all day, and even a tiny amount of saliva during application can affect how well materials set. That is why prep is such a big deal.
When etch and bond are used correctly, the gem has a better foundation. That usually means better hold, cleaner placement, and less chance of the gem shifting before it cures. It also tends to make the finished look more intentional and salon-inspired, which is what most people want when they are going for a radiant, polished smile.
The biggest mistake beginners make
Most first-timers rush the prep because the gem itself is the fun part. That is completely understandable. You picked a shape you love, maybe a crystal, heart, or butterfly, and you want to see it on your tooth right away. But speeding through the prep is usually where wear time gets cut short.
A common mistake is applying onto a tooth that is not fully dry. Another is using too much product, which can make the placement messier and less precise. Some people also do not let each step sit for the right amount of time, or they place the gem before everything is ready.
The fix is simple, even if it takes a little patience. Work on a clean tooth, isolate the area, keep it dry, and follow the tooth gem kit instructions exactly. In beauty, a lot of trends reward creativity. With tooth gems, this particular part rewards precision.
How the application process usually flows
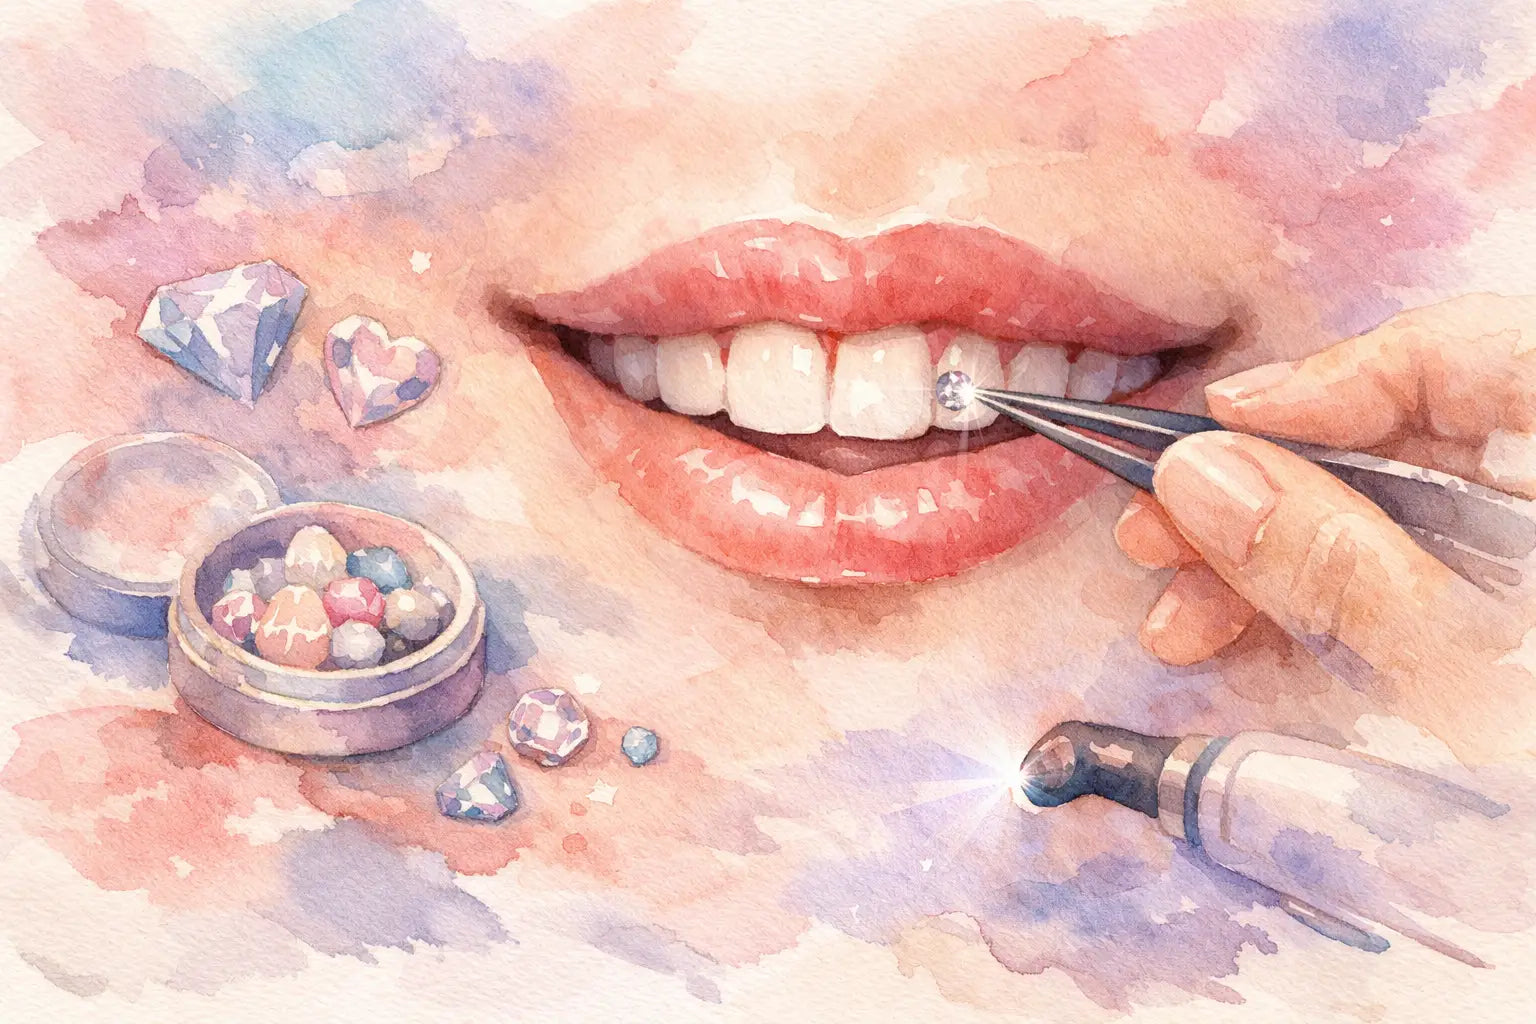
If you are using a DIY kit, the order of operations matters more than anything fancy. You start by cleaning the tooth surface well so there is no debris, oil, or residue. Then you isolate the area to help keep it dry. Cotton rolls and cheek retractors can make this much easier, especially if you are applying the gem yourself.
Next comes etch. This step is usually brief, but timing matters. After the etch is removed according to product instructions, the tooth is dried again. Then bond is applied in a thin, even layer. After that, the gem is placed with care, adjusted if needed, and cured if your system uses a UV light.
That order is important because each step supports the next one. If you reverse steps, skip one, or let moisture get in the way, the final hold can be weaker. A stylish result still needs structure behind it.
Dryness is not optional
If there is one detail worth repeating, it is this: the tooth surface has to stay dry during application. Saliva is the enemy of adhesion. Even if your materials are high quality, moisture can interfere with how well they perform.
This is why the right tooth gem materials and tools matter. Cotton rolls, cheek hooks, and a steady setup are not just nice extras. They help create the conditions that make bond and etch worth using in the first place. For DIY beauty lovers, that is actually empowering. You do not need a salon chair to be precise, but you do need the right setup.
More product does not mean better hold
It is easy to assume that using extra bond or extra adhesive will make the gem more secure. Usually, it does the opposite. Too much product can create overflow around the gem, affect how clean it looks, and make placement harder to control.
A thinner, more careful application usually gives a neater finish. The goal is not a bulky layer. The goal is a secure, balanced hold that lets the gem sit beautifully on the tooth.
How long should a tooth gem last?
This is where the honest answer is: it depends. A well-applied tooth gem can last much longer than a rushed one, but wear time varies based on placement, eating habits, oral care, tooth shape, and how carefully the application was done.
Bond and etch improve your chances of a longer-lasting result because they support the attachment process. They do not guarantee a fixed timeline. If you bite directly into hard foods, touch the gem often, or apply in a moisture-heavy setup, that can shorten wear time. On the other hand, careful prep and smart aftercare can help the gem stay secure and keep your smile looking fresh.
That is why educational support matters so much in DIY beauty. The gem style gets the attention, but the prep determines a lot of the outcome.
Is tooth gem bond and etch safe?
For most shoppers, this is the real question behind the trend. Wanting a luxury look is one thing. Wanting reassurance around your teeth is another. The answer depends on using products as directed and understanding that these materials are meant for this specific kind of cosmetic application.
You should never improvise with random glue or household adhesive. That is where people get into trouble. A proper tooth gem system is designed around enamel-safe application methods and controlled placement. Even then, the safest route is still being careful, following instructions closely, and not forcing the process if you are unsure.
If you already have dental concerns such as weakened enamel, active sensitivity, dental work in the area, or oral health issues, it is smart to pause and get professional guidance first. Beauty should feel fun, not stressful.
Choosing the right setup for a better sparkle
If you want your application to feel easier, look cleaner, and hold better, the full setup matters. The gem is only one part of the final result. The prep materials and tools shape the experience just as much.
That is why many at-home shoppers prefer a complete system instead of piecing things together. When your kit includes etch and bond, placement tools, and curing support, there is less guesswork. It feels more beginner-friendly and a lot more confidence-building. SelfGem is built around that exact idea: making the process stylish, accessible, and easier to get right at home.
The best setup for you depends on whether you want a one-time look, regular gem changes, or a more customized beauty routine. Some people want quick sparkle for a special moment. Others want a signature gem that becomes part of their everyday look. Bond and etch matter in both cases, but your habits and expectations should shape how you shop and apply.
Aftercare still counts
Even a great application needs a little respect after it is done. Be gentle at first, avoid picking at the gem, and stay mindful with hard or crunchy foods. Normal brushing matters, but aggressive scrubbing right on the gem area is not the move.
The overall goal is simple: let the gem be part of your look without turning it into something you constantly test. If it feels secure, leave it alone and enjoy the shine.
A great tooth gem moment is not just about the sparkle people notice. It is also about the confidence of knowing you applied it with care, and that starts long before the gem touches your tooth.