
A cute gem on your tooth can make your whole smile feel styled, but the glue question is where a lot of people get stuck. If you have been searching for diy tooth gem glue, you are probably wondering what actually keeps a gem in place, what is safe to use on teeth, and why some at-home sets last while random hacks fall off fast.
The short answer is this: not all glue is tooth-safe, and the best results usually come from using materials designed for dental-style bonding rather than general craft or beauty adhesive. That matters because your teeth are not like your nails, your lashes, or your phone case. They are smooth, hard, constantly wet, and exposed to pressure every time you eat, drink, brush, or talk.
What people mean by diy tooth gem glue
When most people say diy tooth gem glue, they usually mean any adhesive that can hold a tiny crystal or charm on the tooth at home. But there is a big difference between something that sticks for an hour and something that is meant to bond cleanly and stay put for days or weeks.
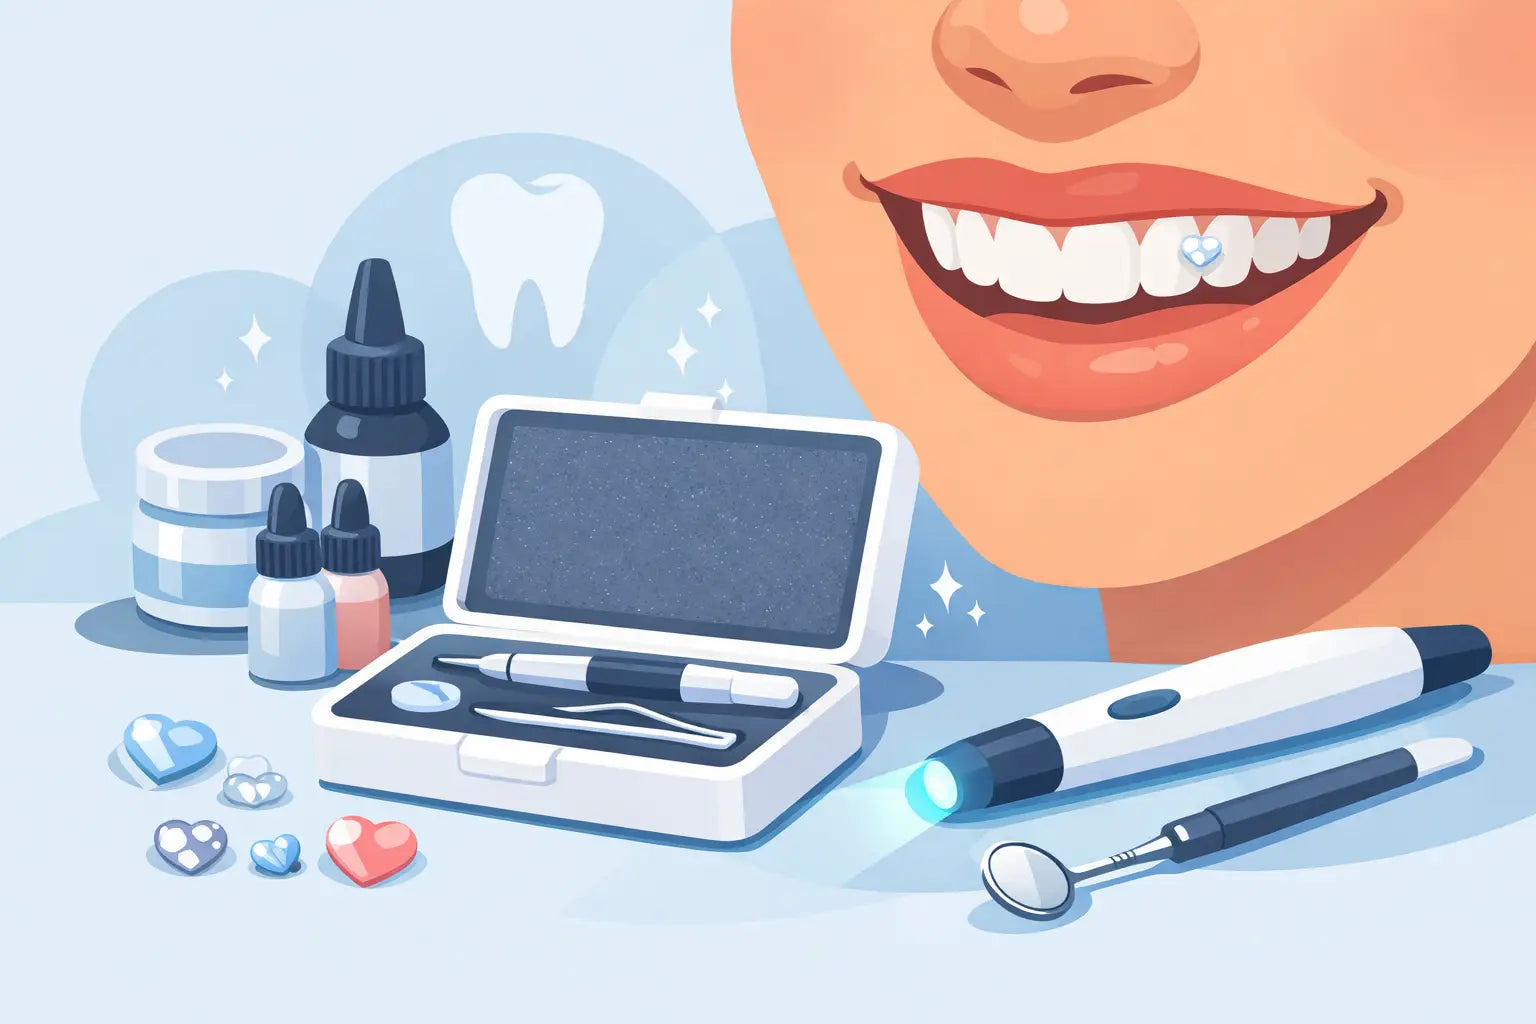
A real tooth gem application is not just about glue alone. It usually involves a prep process that helps the tooth surface hold the gem better. That can include cleaning the tooth, isolating the area so it stays dry, using an etch and bond system, and curing the adhesive properly with a UV light if the product calls for it. The reason salon-style applications tend to last longer is not magic. It is the prep.
Why regular glue is a bad idea
This is where the trend can go wrong. A lot of people assume nail glue, lash glue, super glue, or craft adhesive will do the job because the gem is tiny. It feels quick, cheap, and easy. It is also a risky shortcut.
Teeth need materials that are appropriate for the mouth. General adhesives are not made for that environment, and they can behave unpredictably once exposed to saliva, heat, friction, and daily wear. Some can weaken quickly. Others may be hard to remove cleanly. Even if they seem fine for a day, that does not make them a smart option.
There is also the comfort factor. The wrong adhesive can create a rough feel on the tooth, leave residue around the gem, or hold unevenly so the gem catches on your lip. A sparkling smile should feel luxe, not annoying.
The best diy tooth gem glue setup is usually a bonding system
If you want your gem to look polished and last longer, think beyond a single tube of glue. The strongest at-home approach is usually a small bonding system designed for tooth gem application, often paired with the right tools.
That setup may include tooth prep materials, a bonding agent, an adhesive resin, and a curing lamp. Each part has a purpose. The prep helps the bonding material grip the enamel surface. The bond supports adhesion. The curing step helps harden the material so the gem is more secure.
This is why complete DIY kits tend to be more beginner-friendly than trying to piece together random supplies. You are not just buying sparkle. You are buying a process that is easier to follow and more likely to give you a clean, long-lasting result.
DIY tooth gem glue vs temporary beauty adhesives
There is an it depends moment here. Some people do not want a longer wear look. They want a gem for a party, shoot, or weekend event. In that case, a temporary beauty adhesive may seem appealing because it is easy to apply and remove.
The trade-off is wear time and reliability. Temporary adhesives are more likely to loosen with drinks, brushing, or normal mouth movement. They may be fine for a short look, but they do not behave like a proper bonding system. If your goal is a radiant look that stays put through real life, temporary stick-on methods are usually the less polished option.
If your goal is longevity, go with products intended for tooth gem use and follow the full prep routine instead of relying on a one-step shortcut.
What makes a tooth gem stay on longer
People often blame the glue when a gem falls off, but the adhesive is only one part of the result. Longevity usually comes down to five things: the tooth surface, moisture control, product quality, placement, and application technique.
A tooth that is not fully clean and dry will be harder to bond to. Saliva contamination during application can weaken the hold. Cheap or mismatched products can cure poorly. Placement matters too. A gem on a flatter tooth surface tends to sit better than one placed where bite pressure or lip friction hits it constantly.
Technique is the part beginners underestimate most. Using too much adhesive can make the gem slide or leave excess material around the edges. Using too little can make the hold weak. Curing incorrectly can leave the bond under-set. Good DIY results come from precision, not just product choice.
How to choose a better diy tooth gem glue option
If you are shopping for an at-home setup, look for a system that feels made for beginners but still takes the process seriously. Clear instructions matter. So do the right accessories, because application is much easier when you have tools to keep the tooth dry and place the gem neatly.
A good setup usually includes application support, not just adhesive on its own. Think prep materials, placement tools, and a curing lamp if needed. That kind of kit gives you a better shot at getting the gem centered, secure, and clean-looking on the first try.
It also helps to buy from a brand that educates instead of just selling sparkle. If the product page or instructions explain wear time, prep, aftercare, and what to expect, that is a good sign. SelfGem, for example, builds around the full DIY experience rather than treating the adhesive like a mystery step.
Common mistakes that make the glue fail
The most common mistake is rushing. Tooth gems look tiny, but the process needs a steady hand and a dry surface. If you try to apply the gem while the area is still wet, the bond can fail fast.
Another issue is using too much product. More glue does not automatically mean better hold. It can actually make the gem shift before curing and leave a bulky finish that looks less refined.
Picking the wrong tooth can also affect wear. If the gem sits on a spot that gets constant contact from biting or habits like nail chewing, it may not last as long. And of course, using the wrong adhesive entirely is a major reason DIY applications go sideways.
Aftercare matters just as much as application
Even the best diy tooth gem glue will not do all the work alone. Once your gem is on, how you treat it matters.
Right after application, it is smart to be gentle. Avoid picking at the gem with your tongue or fingers. Be cautious with very hard, crunchy, or sticky foods, especially early on. Brush normally, but do not scrub the gem aggressively.
The goal is to let the bond stay undisturbed while you settle into wearing it. A good tooth gem should feel like part of your smile, not something you are constantly testing.
Is DIY right for everyone?
DIY can be a great fit if you want convenience, customization, and a beauty moment you control at home. It is especially appealing if you like experimenting with your look and want salon-style sparkle without making an appointment.
But it is not for every situation. If you have dental issues, damaged enamel, active sensitivity, or you are unsure about placing anything on your teeth, it makes sense to pause and be cautious. A trendy look should still respect your teeth.
There is also a skill factor. Some people love the process and get the hang of it fast. Others would rather have someone else do it. That does not make DIY bad. It just means the best choice depends on your comfort level, your patience, and how polished you want the final look to be.
The real answer to the glue question
If you are trying to figure out diy tooth gem glue, the best answer is not to hunt for the strongest random adhesive you can find. It is to use a tooth gem bonding system that is meant for the mouth, follow the prep steps carefully, and treat application like a beauty service instead of a quick craft project.
That is what gives you a sparkle that looks intentional, feels comfortable, and has a better chance of lasting. The glam part is the gem. The difference-maker is the method.
A little precision goes a long way when your smile is the main character.